Wednesday, December 31, 2008

Page Maps Contest


This is a layout I did for the Page Maps Blog sketch contest. I love Becky's sketches!
I flipped it because my photos were vertical. It hit me as I was almost done that I didn't have to change the whole orientation ... I could have just flipped the photo section ... but it is what it is :)

I don't remember about Justin (first baby), but Samantha and Andrew both love playing with coffee cups. Maybe it's because they see Kevin (daddy) using his mouth on them all the time. It would be so cool to go inside the mind of a baby and see things the way they do. I wonder Andrew is thinking all the time.

Once again, the background is a download from sxc.hu. The coffee stain and graphic for the brads are from there as well. The striped paper is from Sande Krieger at 2peas. I created the coffee cup tag by myself using a graphic I grabbed from the Internet. Fonts used are Maiandra GD and Got heroin (yes, that's an aweful name). I think that's all ...

*~*~*

I get to order my 365 project tomorrow! Can't wait!

Tuesday, December 30, 2008

Winter layout


I LOVE this layout! Snow makes such a great backdrop. The pictures are great, the colors blend and it just flows ...

I got the layout sketch idea from the January issue of Creating Keepsakes. Yes, I scraplifted :)
The background is a downloaded image from sxc.hu that I changed the hue of to blue. The little blue trees and larger white ones are a dingbat font, DB Christmas Trees from ScrapNFonts.com. The title is a font called Flurries. The snowflakes are a dingbat called Faux Snow. The journaling is in a font called Another Typewriter.

I love it! I think I'm going to experiment and send this off to be printed. I wonder how it will turn out ... if it works well, I may print out more digital layouts to put in a traditional album ...

*~*~*

Monday, December 29, 2008

Digital Layout

As I said in a previous post, I believe I will try digital scrapbooking for a while. I've done some graphics before, but not scrapbooking ones. I use Macromedia Fireworks as my graphics program and there isn't a way to load those magnificent brushes (at least that I know of). I REALLY wanted to because they're amazingly beautiful, but I made do with other things like fonts and dingbats and making my own.
However, I recently discovered that a lot of digital elements are available in .png format (which is the Fireworks format). Yippee! Now I have to decide what would be most practical to buy!

My first attempt at an "official" digital scrapbook page is this:
What makes it official? Well, the square size is the first part. My other graphics were rectangular for a computer wallpaper or a poster printout. I also used official digital scrapbooking elements. The red scalloped background and brown polka-dot 'paper' are part of a free download designed by Sande Kreiger from 2 peas. The swirls are from scrapNfonts. The pointsetta flower is a dingbat font. The notepad paper I downloaded from sxc.hu. The rest is stuff I put together on my own.

*~*~*

Now, the really important credit goes to journalingjunkie for putting up a challenge and Tanya for the sketch. The gals at journaling junkie have a regular contest and I've always admired but never done anything. I really am bad ... but now that I'm digital, I've already completed two layouts! Yay! I'll show you the second tomorrow!

P.S. I'll elaborate a bit in the next post, but I'm hoping to find out the rules of etiquette for digital scrapbooking and would appreciate ANY hints.

365 project

I'm going to do the 365 project using the kit by Becky Higgins.
I'm excited because I know I can do this and I'll have a completed album of a year's worth of photos. It goes on sale on January 1st, but I've already started because this is the week that the new year starts. Now the biggest challenge will be deciding which photos to use. You don't want them to be redundant and yet sometimes there are way too many to choose ...
My photos are still on my camera, but when I download them, I may share.

*~*~*

Sunday, December 28, 2008

Digital Scrapbooking and 365 project

First, let me share a fantastic opportunity. Rhonna Farrer is offering a huge giveaway of digital items on her blog here. Make sure you head on over and check it out!

It's taken me over a year of agonizing, debating and going back and forth, but I think I'm going to go mostly digital for my own personal memory keeping.


I love scrapbooking. I really do. The problem is that it takes time. Time I haven't taken. I do schedule crop nights and work a little bit at home but that isn't enough time to really catch up the way I'd like to. Some people are good at it. I'm not. It takes me hours to do one layout. I have to get all of my supplies and spread them out. Then I have to pack up and clean up before I'm done! A lot of people have success with seperate craft rooms, but my house isn't that big. I also don't can't stay up until 3 am after the kids have gone to bed.

I tell myself that it's because I have three kids 4 1/2, 3 and 8 months, but it's just an excuse. No matter what the reason, I don't want to get further and further behind.

So, I'm taking steps to try and catch up as well as prepare for the future.
  • I'm going to put Justin's baby book on hold because I'm past the 6 month mark. He's over 4 now! Boy am I bad :)
  • I'm going to start both Samantha and Andrew's baby books and go through at least 6 months.
  • I plan to do a digital photobook as a year in review of 2008.
  • I plan to do digital layouts as we go into 2009 (I tend to have more time on the computer than to physically scrapbook with paper).
  • I'm going to participate in the 365 project using the kit by Becky Higgins. You take a picture every single day, journal a bit, and DO it! It's a great way to have a year's worth of pictures in one place (not perfect, but really great anyway).
  • I plan to scrapbook major events like birthdays and holidays in digital format for 2009. At the end of 2009, I'll print out a digital scrapbook. Perhaps in 2010 and beyond I'll combine paper and digital scrapbooking, but I will not do personal paper scrapbooking until I have caught up with the baby books.
  • I will create quick photobooks of the last 4 years to catch up and then decide where to go from here.
  • I still plan on creating paper art as gifts and for craft fairs ... got to have my paper fix. Plus, I make more gifts for others than I scrapbook for myself anyway. My mom has more photos of my kids than I do!

I know it's a lot and we'll see what I actually am able to do, but it's still my goal!

I've already done two digital layouts of the holiday season. I'll post them for you soon!

Grande finale


Here's the last page:
This is the December graphic for my year in review calendar. I hope you enjoyed it!
Once again, I downloaded all of the background images from sxc.hu. My design inspiration was from Ali Edwards. The font used was CK_Alis_Handwriting. It was a free download from Creating Keepsakes.
No, I didn't do anything incredibly fancy. I enhanced the color of my photos, I collaged a few of them, but for the most part, my design was very straight forward. However, it was all custom. I decided how to place my boxes and how many to use. I worked around the photos I had for that month. You could probably find some great calendar templates out there, but this was my own work and I'm proud of it.
I hope you enjoyed all of the calendar graphics and you can view them all in my gallery here.

Saturday, December 27, 2008

Under the weather


The whole family has the sniffles ... no fun.

But, here to cheer you up: The November calendar graphic! I LOVE the photos for this one.

Enjoy!

Friday, December 26, 2008

Visiting relatives for the Holidays ...

Well, I'm off visiting my husband's relatives. Lots of fun :)

Today I'll share the graphic from October. It's one of my favorites. Maybe it's because it highlights my sister's wedding ... gorgeous!


This has the most pictures of any of my graphics. How could I choose?

And, for Kevin's family ... another graphic:


Hope you're still enjoying the Holiday season!

Wednesday, December 24, 2008

Christmas Eve stocking stuffer

So, I'm up late. No, I'm not wrapping gifts or making last minute preparations. I'm taking care of baby.
But, while I'm up, I might as well share family goodies :)

This is the graphic for September on the year in review calendar.
This is one of my favorites :) Just FYI: the lower left hand picture is of my two eldest in their Grandma's clothes drier ... what fun!

And because we took a trip up to Maine in September to visit Kevin's mom ... here is her graphic.

Enjoy your Christmas everybody!!! Jesus is the REASON for the Season!

Almost Christmas!

You're probably rushing around finishing up last minute Christmas things ... so am I :)

Today it's time for the August review graphic. I really like this one. It's bright and colorful, but the pictures are great as well. For August, I highlighted our trips to visit various groups of water :) The kids are so cute. Justin prefers to play in the sand and Samantha won't get out of the water until she's blue and shivering.
Once again, all of my background graphics were found at sxc.com, designs are my own but inspired by the simplicity of Ali Edwards design, font is CK_Alis_Handwriting and software used is Macromedia Fireworks.

Enjoy!!!

Monday, December 22, 2008

Halfway through ...

We're very close to Christmas and we're halfway through the year in review calendar. Hope you're enjoying it.

Here's July:

Sunday, December 21, 2008

Chillin'

Major snow today. Got to love it! There are inches upon inches of snow outside, but I'm toasty by the fire ...

It's time to highlight the June graphic from my year in review calendar. It was warm enough to have some lovely water play photos. One graphic has pictures of my hubbie's brother and family and the other has the kids with my father, so there are two lovely graphics on display.


To be honest, when you're dealing with this many photos, you sometimes forget about a few and this is one of those cases. I had three GREAT photos that I forgot to use ... ugh!

Hope you enjoy :)

Saturday, December 20, 2008

Carpeted in snow ...


I love the snow. True, it's cold and wet, but it's so beautiful!

Today, in honor of the snow, we will highlight not one, but two graphics from our year in review calendar.

Here is April.


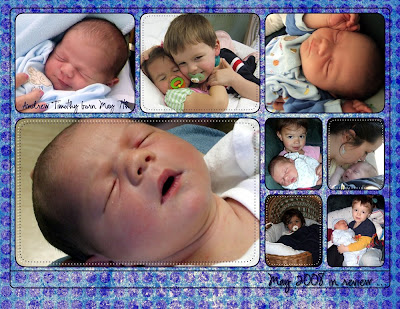
Here is May - the month that our dear little Andrew was born :)

Friday, December 19, 2008

Snow!

It's becoming quite the winter wonderland in New England ... well, at least it started today! I'm so excited and can't wait to look out my window in the morning and see how much snow has come down! The kids will be able to go sledding for the first time this year and they're just now big enough and old enough to really enjoy it :) So exciting!

Today we'll be highlighting the March review graphic for the calendar ...
This is the generic one of just the kids and us. I'm very pregnant in these photos, but you can't tell :) Kevin had a business trip to Mass and we went to the Boston Green and played at the park there. What fun!

And this one is for my side of the family because it has my family's Easter photo. When do kids start looking good and posing for family photos? I hope it happens soon ...

Hope you enjoyed!

Wednesday, December 17, 2008

Shipment is in!

I'm so excited! The shipment of calendars came in today! They look great :) It's always so cool to see what you've created digitally in a hard copy format and physically hold it in your hands!

Today, I will highlight the graphic from February:

Believe it or not, I didn't have a ton of photos for February. Then, the ones I did have were cute, but not necessarily calendar material. So, I kept it simple and enhanced it with a bright background and more border accents than normal.

Tuesday, December 16, 2008

Christmas!

Can you believe it? There's only a week and one day until Christmas!!!
I love Christmas. I love the decorations, the lights, the sweets, the family time ... I love it! It never seems like there's enough time to accomplish what I'd like. I thought about doing a December Daily album but didn't have/take the time. I wanted to handmake more gifts (still working on that). I wanted to have a cleaner, neater house. Alas, we can't all have what we want. But, the important thing is that the family is happy and they are :) The kids are really getting into Christmas. It's a joy to watch them! My favorite new tradition is pointing out the Christmas lights when we drive after dark.

So, while I work on finishing up my Christmas gifts, I'll share something I've actually completed.
As I did last year, I created a year in review calendar.

It was once again really hard to choose only a few photos for each month. I also did a new design concept. I carried this same design theme over all 12 graphics with small variations. At first, I was concerned that it was too graphic and not unique or 'artsy' enough, but I got over that enough to continue.


I've decided to post 1-2 each day leading up to Christmas and hopefully post my other projects after they are given as gifts. I hope you enjoy the glimpse into my family's life over the last year and maybe you'll be inspired in some way :)

So, without further ado, here's January:

There are two versions. The second one here has a picture of my brother-in-law and his children with my hubby and kids that will be included in the calendars for my husband's family.
Credits: Ali Edwards for inspiration modified by me and made my own. Font is CK_Ali_Edwards. Background was obtained through sxc.com (Stock [photo] eXChange).

Monday, December 8, 2008

Scrapbooking for Baby!

Hello all :)

No, I don't have anything to post. I have created a few things, but I forgot to take pictures before giving them away. Silly me!

Anyway, I stumbled across this blog that is doing a series on the best in baby scrapbooking.


So, I think I'll follow along and see if I can get some inspiration. I really like the first post about the mini-book with the tags. I've seen these tags and thought about getting them. I probably will, but who knows when :) Andrew is 7 months old now and I haven't scrapped a thing! Oh, so much to do!

Friday, November 28, 2008

Wedding Favors

Hello all! I hope you had a wonderful Thanksgiving!

On this slow and easy day (for us non-BlackFriday people), I thought I'd post my final wedding installment - the favors!


We made 96 - yes, ninety-six - of these mini squash books as favors for my sister's wedding. To reduce cost and stress, I tried to stream line the process as much as possible. However, it was still a lot of work.

First, I cut 288 6"x6" squares of white cardstock. These squares were then folded in quarters and then once diagonally. Three of these folded squares glued together form the inside of the squash book.

This is the finished product, but gives you an idea of what the inside is supposed to look like:


Then I cut up three stacks of DCWV Luxury cardstock papers. I needed 192 6"x6" squares for the covers. Then, I needed 384 2 3/4" squares and 1152 triangles (2 3/4" squares cut diagonally) for the inside.

So, my mom and I folded and glued the inside pieces, cut the paper, and glued cover papers on 192 pieces of cardboard.


Then came the part where we recruited lots and lots of help. We needed to glue the decorative papers to the inside of the squash books. I laid out 96 designs on tables (6 tables to be exact) and we set out gluing them. I'd like to thank all of those involved!

Hopefully, this next picture gives you a pretty good idea of what it was like. It took several evenings of gluing fun, but finally we were done!


After they were all glued, I cut 192 pieces of coordinating ribbon and attached them to the covers and the covers to the insides using glue dots and glue sticks. Lastly, cropping 96 photos, attaching them with photo corners (so guests can replace picture with one of their choice) ... and voila!

The end result was quite striking if I do say so myself :)

Saturday, November 22, 2008

Calendar for 2007 (2006 pictures) - Part Deux

As I said in my last post, for Christmas 2006, I gave both my mother and my mother-in-law 2007 12x12" calendars with 12 scrapbooked pages full of pictures of my children from that year ('06).

I showed you the one for my mother-in-law in my previous post. This post will highlight the other one.


I started with an Elegant Bouquet Paper Pack and Stickease from CTMH. However, that was not enough, so I supplemented with floral papers I selected from my LSS. I found some really great ones (note the embossed vellum one used on the March layout above).


Several layouts are almost exactly the same design as the ones done for the other calendar. Most of them flip-flopped color vs. black&white photos.


Sometimes I came up with a completely different design for one reason or another.


I used metal alphas from Joanne's to highlight the passing of the seasons.


All of the images are in the gallery. You can view them here.

I hope you enjoyed this!

Wednesday, November 12, 2008

Holiday Calendar Mode

Well, now that I've come down from wedding mode, I'm looking towards the holidays.

I will get to a project post. Have no fear. However, you must muddle through a few personal thoughts first.

I've been going through all of my photos. I've had numerous computer problems over the last few months and my organization system has suffered. Now that I have a pretty good handle on them, I'm going through all of the 2008 photos and trying to choose the select few that will make it into the Year In Review calendar. After that, I will design at least 12 graphics. I'm looking forward to it, but I'm also feeling a lot of pressure to get it done ...

I didn't take nearly as many photos this year. I don't know why that is. Maybe I've been in a mood, but I think a lot of it has to do with being pregnant and the subsequent birth of my third child. Busy does not even begin to describe my life and tired follows right behind ... for instance, I took the kids to Kid City Museum recently and spent the whole time with a baby strapped to my chest and running after the other two. I snapped a few pictures, but they weren't the best. I couldn't get the kids to hold still and because I had three of them, I wasn't able to just take a million photos where it is inevitable one would turn out all right. Very disappointing.

So, this is where my creative genius must come forward. If you have great photos, sometimes the page just creates itself. It doesn't really need me. With mediocre photos, you must insert a bit more to make it special ... I'm praying for inspiration right now.

But, because I didn't want to leave my occasional blog readers hanging, I will post a project that you haven't seen yet :) Maybe past inspiration will turn into future inspiration!


Two years ago I made calendars as Christmas gifts to give to my children's grandmothers (my mom and Kevin's mom). I thought it was a grand idea. I had gone to my friend Moniqua's first CTMH party and bought the calendars thinking it would make a great Christmas gift if I scrapbooked pictures of my kids for each month. I was right. I just had no idea what it would entail ...


So, each calendar has thirteen 12x12" blank pages (one for each month and a cover). So, that's 26 scrapbook layouts. I started about 6 weeks ahead ...


Short story is that thousands of pictures later, two paper packs, embellishments, an unbelievable amount of glue, and a lot of work later I had two works of art!

The long story ... I printed out almost every photo of the kids from 2006 in color and black & white as well as in 4x6 and wallet size (got two that way). Yeah, it was overkill, but I used several of them and have a lot left over for my own scrapbook if I ever get to it.


I used the Basic Grey Lilykate paper pack for one calendar (needed two of them) and a Close to my Heart paper pack for the other one. However, I didn't have nearly enough paper and a few of the patterned papers weren't what I liked, so I supplemented by buying coordinating papers from my LSS.

I used similar design layouts for several of the pages and once I did one month in one calendar, I almost always copied the layout in the other one with different papers. Occasionally, I adjusted the pictures used.


As I was loading pictures, I realized that I had only taken pictures of the calendar I made for my mother-in-law (Lilykate). I must have thought that I could take pictures of my mom's anytime ... now I have to do it. I can only display five photos here, but I have uploaded them all to my gallery and you can check them out here. Believe me, you'll enjoy them :)

Never again, though. I took over half of the living room floor and spent every night up past midnight to complete them by Christmas. That's why I switched to the digital layouts. At least I take up less space :)

Saturday, November 8, 2008

Maine Layouts

I hope you enjoyed all the previous posts about the Bridal Shower. Make sure you check them all out.

But, now it's time to move on to new things ... I finished three scrapbook layouts! I actually started them over a month ago, but had to put them on hold because of the wedding.

They are of our recent family trip up to Maine to visit my in-laws. We always have a good time in Maine. The kids love visiting Nana and Papa. This year the mosquitoes ate us alive, but it was still fun. As the kids get older, it gets better and better because they learn to enjoy it for it's true beauty.

Once again, I wish I was better at taking pictures of my layouts. I know most of it is the lighting, but still ...

For these first two, I painted my own background mat. I'm not sure if I like it. The wet paint made the paper warp
The first one is a mix of lime green and white paint. I used Miss Elizabeth papers. I used Basic Grey chipboard monogram letters, but didn't want the bulk so I traced and cut them out on patterned paper. CTMH label and stars.

Same papers and idea for this layout. Painted background in bright blue paint on lime green cardstock. I inked the brown chipboard letters (yes, the bulk was acceptable this time) with CTMH chocolate ink. They are from Making Memories and Basic Grey. I painted the blue ones (the 't' has a painted lime green interior)

Nothin fancy here but a lot of squares. Patterned paper from Miss Elizabeth. Notice the moose on the left. Can't do a Maine layout without a moose. Metal 'togetherness' word from Making Memories.

I took over 100 pictures of this trip, so I tucked the pictures I didn't scrapbook into divided page protectors behind the layouts so that all the pictures are in one place. I'm trying to catch up with some things and I this is a start :)

Wednesday, November 5, 2008

Bridal Shower Thank you Cards

No, I'm not much of a card maker. I wouldn't mind being better at it, but it takes such time and patience! I rarely put aside enough time to make one properly and I don't like to make them in advance because I want them to be personal ...

But, I made time for my sister. I thought it would be really cool for her to have thank you notes that coordinated with her shower.

If you were at the shower, you can look forward to getting one of these in the mail :)

So, I sat down while still in major stamping mode (did you read how much stamping I'd done at this point?) and came up with four or five designs. I showed them to Beth and asked her which one she liked best (rather on the sly because she didn't know how we were doing the shower). She picked this one.


So, I bought a few packages of white cards and envelopes from Walmart and stamped away! I made it a bit easier by following a pattern. Instead of cleaning the stamp for every color for every card, I'd stamp all the big yellow flowers (one on each card) and then move on to the next color for big flowers and then do the medium flowers on all the cards and then the smaller flowers and so on.

For all three flower stamps used, I went from yellow, to green to pink to purple to turquoise in order to minimize bleeding darker ink onto a lighter color stamp pad. Even if you clean the stamp between colors (which I did) there was often just enough to cause a problem if you went from purple to yellow. Also, when you're doing this much, you don't feel like double cleaning and drying each stamp each time ...

I matted the center sentiment in three different colors. This isn't a very complicated card style. The stamping is what makes it time intensive.


I toyed with the idea of doing a fancier sentiment. I experimented with glue stamp pads and glitter. It looked pretty, but the glitter continued to shed no matter what and the glitter particles stuck on everything! I don't know if it always does that. Does anyone have tips to make a clean glitter stamp? Also, the glitter colors (I tried three shades of pink and two of purple) didn't match at all. Even if they looked good in the jar, once they were on the stamped image, they didn't go with the card. So ... I gave up on that idea.

I also stamped the envelopes with a little spray of flowers - one in every color (except green because I did a green leaf).

I forgot to take a picture of it, but I also stamped Beth's name on the inside of the card and accented it with different color small flowers. It added a nice personal touch.

CTMH inks: Bubblegum, Hydrangea, Ocean, Citrus Leaf, and Sunny Yellow. CTMH acrylic stamps: Friendship Blessings.

Bridal Shower Photo Booklets

This is where the limit of 5 photos could hurt me ...

Please refer to previous posts about the Bridal Shower to confirm that we were going with a bright theme.

My friend, Moniqua (who's also my CTMH consultant), showed me this booklet and I loved it! So, I asked her for instructions (which she generously provided) and I set about making some. I made one as a gift before thinking that by stamping my own patterned paper, I could make coordinating ones for the bridal shower. I gave one to Beth, each of the bridesmaids, our hostess, my mom, my Grandma, my aunt, Beth's future mother-in-law and Beth's future sister-in-law (they helped with the dessert). I filled many with photos after the event before giving them out.

No two are the same!

Here is one I chose to highlight - the multi-colored stamping with green background.
This is the front with the ribbon tied:

Here is the outside cover of the entire booklet (notice that for the back I stamped directly onto the cardstock base and not on a separate piece of paper):


Here is the inside after opening the cover flap:

Here is the inside after flipping over the first page (on green cardstock base):


For this one, I stamped on a white sheet of paper and wrapped ribbon around it. On some of them, I stamped directly onto the shite cardstock background piece.

Each booklet needed 12 pieces of cardstock (various sizes) cut and stamped and 8 pieces of colored cardstock cut to size. The ones with muliple colors took much more time to stamp, but I think they look fabulous!

As you can see, they look pretty without any photos at all! Believe me, it was hard to cover up such pretty paper with photos!